Spectre Lumeta comes with a self-signed certificate that allows Secure Sockets Layer (SSL) for the web GUI out of the box. Best practice is to request and install a certificate from a trusted Certificate Authority (CA) that verifies the authenticity of the Spectre Lumeta system and avoids users from receiving warning messages like the one below:
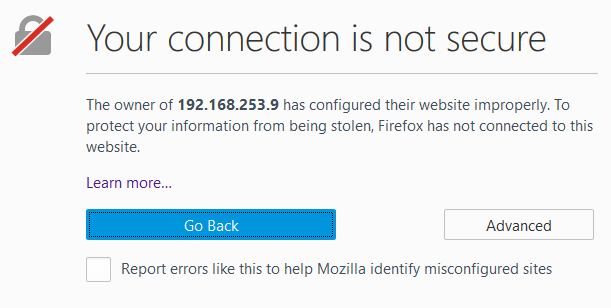
Figure 1: Warning when using untrusted Cert
It is recommended to enable Server Authentication for PKI User Authentication to be successful. Due to lock down restrictions, PKI User Authentication may not work without Server Authentication properly configured first.
A. Before you Begin
- Verify tools putty, winscp, puttygen or similar are installed on your PC
- Certificate Authority Public Chain has been installed.
- Discuss with your Network Admin how to access your company's CA public chain certificate and how it is recommended to install the chain.
- Optional: Install the end CA Public certificate
- Your Network Admin may also supply the end CA certificate. This is the final CA of the chain. It can also be installed using the company recommended procedures.
- Example how to Install the CA public certificate via your browser.
- On IE Navigate to Internet Options Content Certificates.
- Navigate to Trusted Root CA and select import to open the import tool and install the certificate.
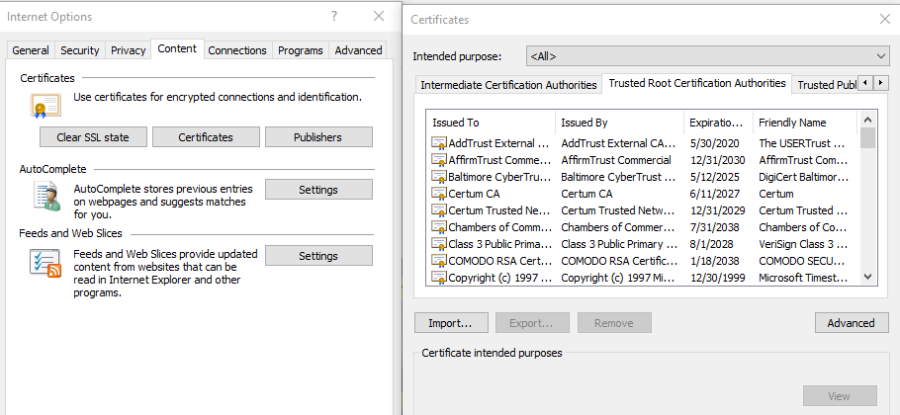
Figure 2: Import CA Certs to PC
...
Server Authentication
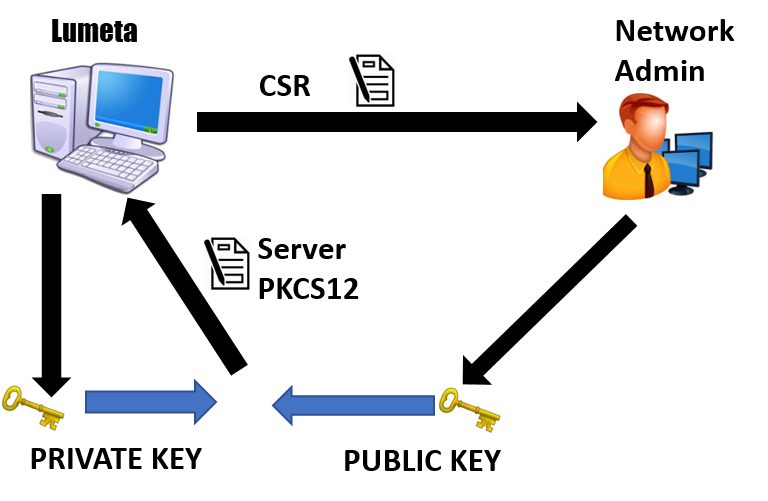
Figure 2: Sever Authorization
1. Certificate files you will need for Server Authorization
Below are the files you will need to obtain to configure server authorization. In parenthesis is the common format these files are in, however your Administrator may distribute the files in a different format.
- Private Key of the Command Center (.key)
- Certificate Signing Request for the Command Center (.csr)
- Certificate Authority Public Certificate for Command Center (.cer)
2. Obtaining Server certificate files
Listed are openssl commands you can use to obtain the Command Center private key, the Certificate request, and the Command Center CA public key. These are only suggestions; please talk with your Network Admin if your company has specific ways to generate these files.
- Private Key of the Command Center
- Below is an example how to create your Command Center Private Key.
- On the Command Center as the admin user type:
openssl genrsa -aes256 -out "CC-private-key".key 2048 - You will be prompted to enter a pass phrase twice. Type 'pwd' to show the file path your private key now resides. You will need to be in this path for all future opensslcommands in this section.
- On the Command Center as the admin user type:
- Below is an example how to create your Command Center Private Key.
- Certificate Signing Request for the Command Center
- Using the Command center private key from step a you will need to create a Certificate Signing Request to send to your PKI group or Network Administrator. Here is an example command to create your Command Center Certificate Signing Request.
- On the Command Center as the admin user type:
openssl req -new -key "CC-private-key".key -out "CC-signing-req".csr - You will be prompted for the private key passphrase. You will then need to enter information for the request; please discuss with your Admin how to complete this form.
- On the Command Center as the admin user type:
- Using the Command center private key from step a you will need to create a Certificate Signing Request to send to your PKI group or Network Administrator. Here is an example command to create your Command Center Certificate Signing Request.
- Certificate Authority public key for Command Center
- Submit the "CC-signing-req".csr from step b to your PKI group or Network Administrator. They will supply you with the Command Center public key verified by your company's Certificate Authority; usually named "Command-Center-IP".cer. Please confirm with your admin the format of this file; Lumeta recommends the file be in pkcs7 format.
3. Convert Server Certificate Files into the Correct Format
Transfer the "Command-Center-IP".cer public key to the Command Center via winscp into the same directory as the private key. SPECTRE requires the Server certificate file be in pkcs12 format and a bundle of the Server private key and public key. The below openssl commands assumes the Command Center public key "Command-Center-IP".cer is in pkcs7 format.
...
Generating a Certificate Signing Request
The first step in obtaining a server certificate is creating a Certificate Signing Request (CSR) file. Speak with your Network Admin on the preferred method to create the CSR.
Lumeta supports openssl. You can use an online tool like Digicert OpenSSL CSR Generator to obtain the openssl line command needed to create the CSR file.
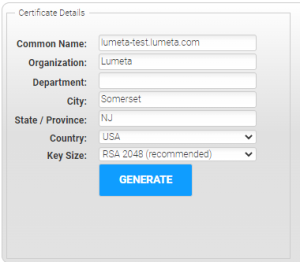
Will generate this command: openssl req -new -newkey rsa:2048 -nodes -out lumeta-test_lumeta_com.csr -keyout lumeta-test_lumeta_com.key -subj "/C=US/ST=NJ/L=Somerset/O=Lumeta/CN=lumeta-test.lumeta.com"
Log into your Lumeta system. Type support bash at the CLI to enter the shell prompt. Copy and paste your unique openssl command and hit enter. Two files will be generated:
-the csr file.
-your private key.
Make note of the directory with the pwd command. Send the csr file to your network admin and request the CA certificate be in pem format.
Convert Server Certificate Files into p12 bundle
Lumeta requires a certificate in the form of a p12 bundle of the CA server certificate, private key, and intermediate key (if applicable). The p12 bundle must have a friendly name and password,
Please discuss with your Network Admin if you can get the certificate in this format. If unable, then request the certificates in pem format and follow these steps.
Copy the two file to the Lumeta System in same directory as the private key generated in above step.
- Bundle the Command Center Private Key and the newly formatted Command Center Public Key into a pkcs12 file.On the Command Center as Admin User:p12 file.
- Login to the Lumeta System and type support bash.
- cd to the directory of the private key, server certificate, and Intermediate certificate(if applicable).
- Type the below command updating with the appropriate file names. Leave out single quotes and for friendly name supply your unique word.
openssl pkcs12 -export -in "CC'server-certificate' -pem".cer-inkey "CC-inkey 'private-key".key -out "CC-IPaddress-pkcs12".p12 -name "friendly-name"Provide a friendly name, you will be prompted for this name when installing the certificate. ' -certfile 'intermediate-certificate' -out 'lumeta-server-certificate.p12' -name 'friendly-name' - Remember the friendly name you defined. You will need this later.
- User will be prompted to enter the pass phrase for the private.key. Also the user will need to provide twice the Export Password.
- Remember the file name "CC-ipaddress-pkcs12".p12 file you created. If needed type pwd to remind yourself of the path this file resides.
...
- A new certificate in p12 format has now been created. This is your new server certificate.
Installing the Server Certificate
- Through CLI: On the Command Center CLI type the following command to install the certificate:
certificate server install "pathto/file/filename" "friendly-name" "private.key password" - Through WEB UI:
- Copy the "CC-ipaddress-pkcs12".p12 off the Command Center to your directory.
- On the UI navigate to Spectre Lumeta Systems and Manage PKI.
- Select Server Certificate from the Certificate Type. Upload the Certificate and input the Friendly Name and Password.
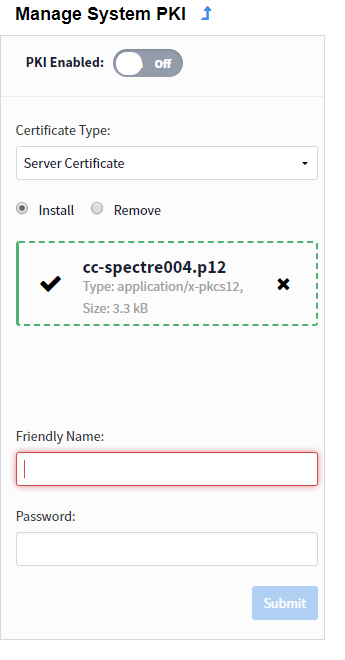 Figure 4: Install pkcs12 Server Certificate
APPENDIX A: Verifying Certificates
...