Page tree

Versions Compared

Key

  • This line was added.
  • This line was removed.
  • Formatting was changed.

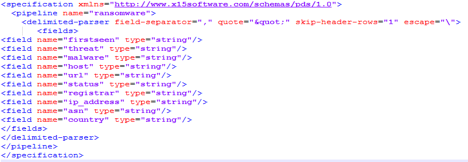
Before beginning this procedure, you'll need the URL to an open-source data feed. Illustrations on this page use https://ransomwaretracker.abuse.ch/feeds/csv/ to serve as a representative example.

Process

Expand
title1. Create a "spec" file of column headings.
  1. Open the open-source data feed.
  2. Identify the column heads and separation symbol.

    Column Heads:Separation Symbol:

    Firstseen (UTC),
    Threat,
    Malware,
    Host,
    URL,
    Status,
    Registrar,
    IP address(es),
    ASN(s),
    Country

    comma


  3. In your favorite text-edit application, update spec.xml to contain the column heads you need. Your updated xml file should look similar to this:


Expand
title2. Create a "sample_data.txt" file of column data.

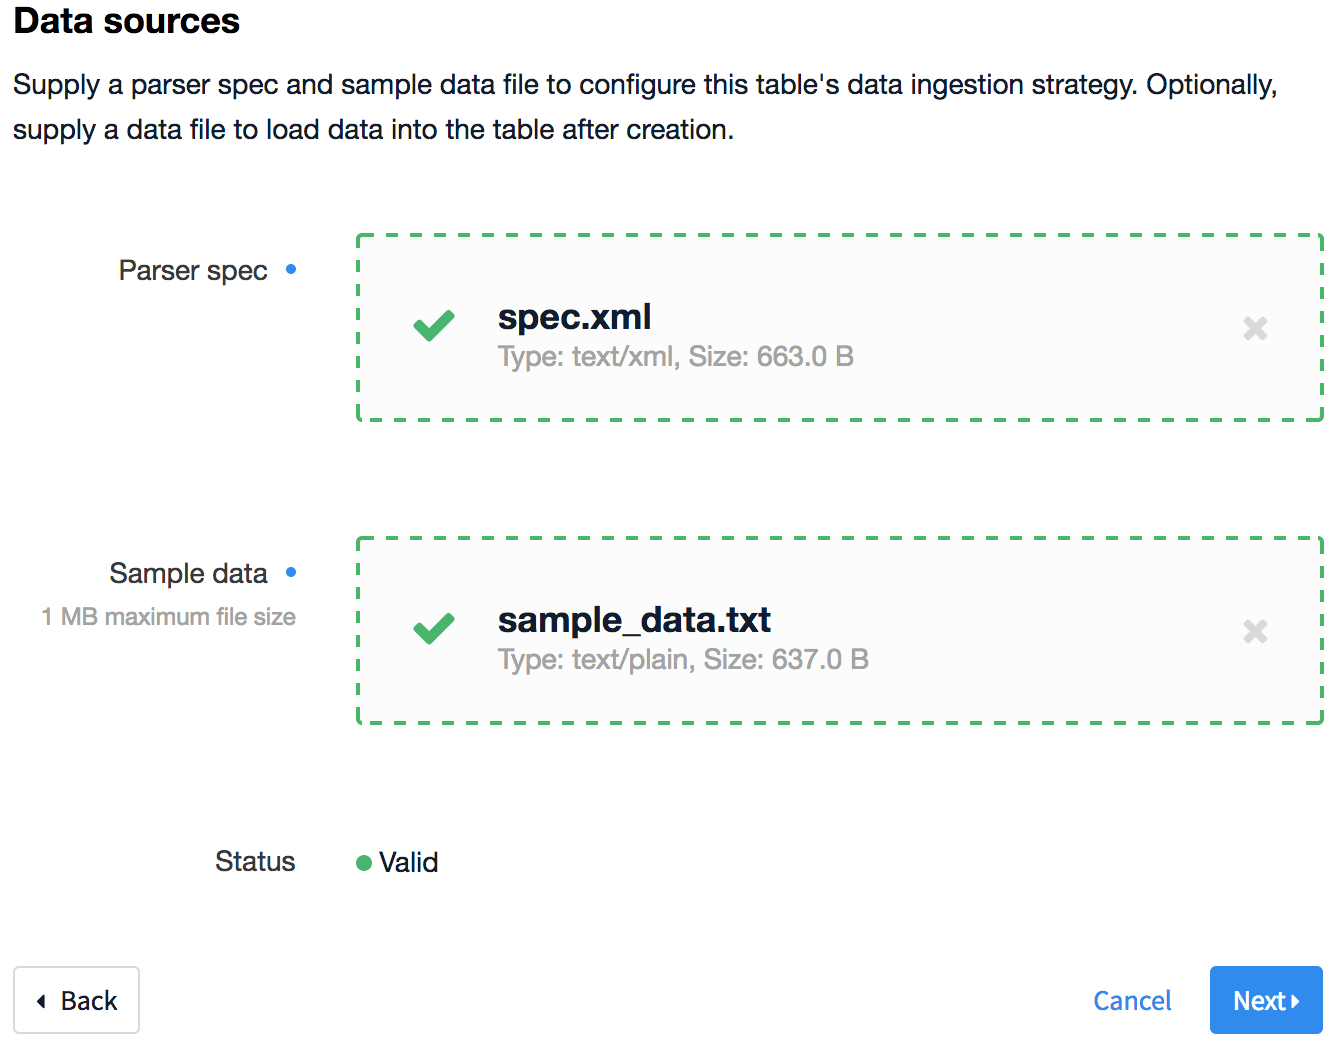
Still in your text-edit application, create a sample_data.txt file like this one that contains one or more rows of data from the feed.


Expand
title3. Import your spec and sample data files to SpectreLumeta's HDFS data store.
  1. Log in to Spectre Lumeta Command Center via your browser interface.
  2.  Navigate to Settings >Tables > Add Table.
  3. In the Name field, enter a descriptive name for the table you are creating such as ransomware_tracker_feed.
  4. In the Table Type field, select Managed Primary Table.
  5. At your option, you can add Tags to help other Spectre Lumeta users to find the table and a Description to let others know the purpose of the table.
  6. Browse to and then select the spec.xml and sample_data.txt files.
  7. Click Next.
    The column headings for your table display, ordered alphabetically. Review the values listed in the Field column to confirm that they match your spec.xml. 
  8. Click the Value Index checkbox for those fields you want to HDFS to index immediately. If you do not check any items in the Value Index column, your table with still be created–just not indexed.
     
  9. Click Create Table.
    The table structure is created in the SpectreLumeta's HDFS data store.


Expand
title4. Insert feed details to SpectreLumeta's PostgreSQL database and confirm the addition.
  1. Log in to the CLI of your Spectre Lumeta Command Center.
  2. At the command-line prompt, enter support db.
    You now have access to SpectreLumeta's PostgreSQL database.
  3. Insert the feed details into Spectreinto Lumeta's PostgreSQL database using the Insert command.  The labels will remain the same from feed to feed. The values for each label will need to be customizer for your feed. Here's a sample entry:
    insert into system.feed(name, shortname, enabled, overwrite, url, key, filename, tablename, pipelinename, pollinterval) values ('ransomware-tracker', 'ransomware', true, true, 'https://ransomwaretracker.abuse.ch', '','/feeds/csv/', 'lumeta.public.ransomware_tracker_feed', 'ransomware',1440);
  4. Make sure the insertion was received by entering
    select * from system.feed where name ='ransomware-tracker';
    A response similar to this one indicates that SpectreLumeta's database has received the insertion.
  5. To validate the connection, restart the lumeta-api service by entering:
    support service api restart

     The feed will begin to populate and records will very soon be available in the Spectre Lumeta GUI.


Expand
title5. View the table you created in Spectre Lumeta to ensure that it displays properly.
  1.  In the Spectre Lumeta GUI, browse to Settings > Tables.
  2. Select the ransomware_tracker_feed table.
  3. Check the number of records present to confirm that the database has been populated.
  4. Click View.


    Congratulations! The table displays. Spectre Lumeta has ingested an external data feed.

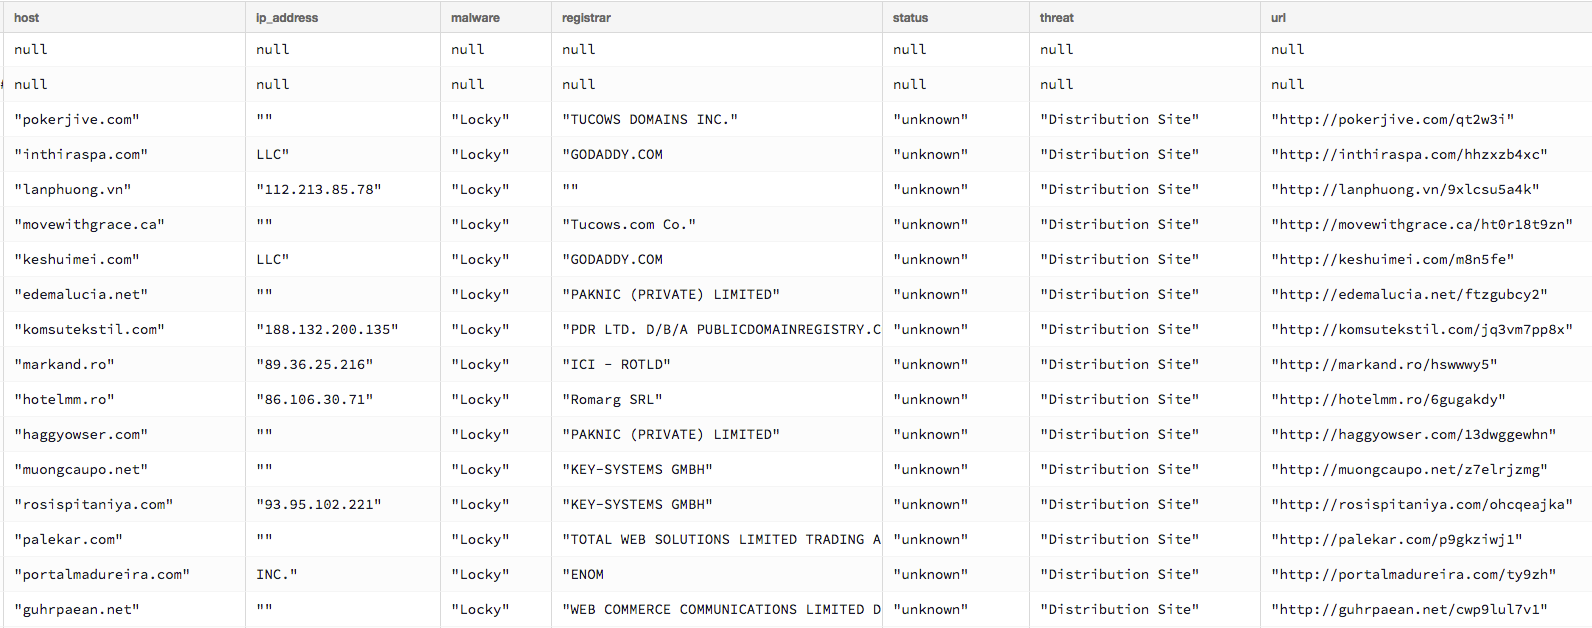
Congratulations! You have caused Spectre Lumeta to ingest a feed of external data.